Understanding your Menu structure
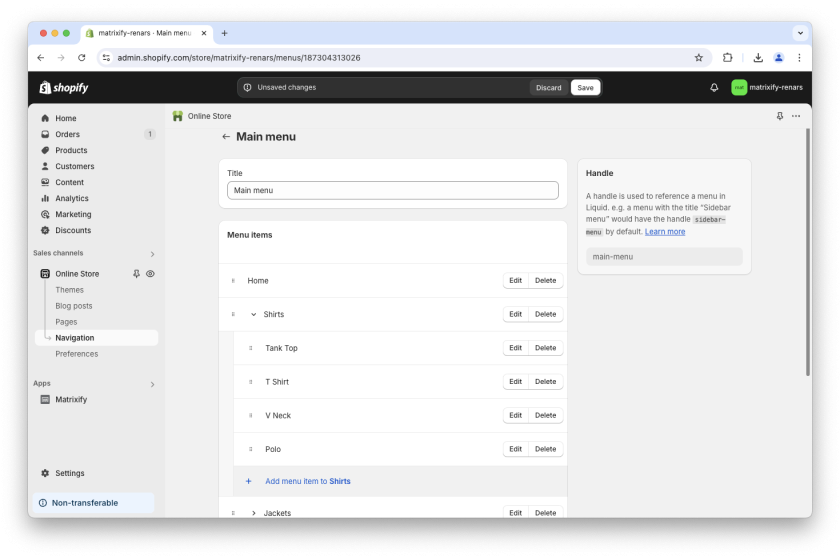
The first task for importing Shopify navigation Menus is to understand the Menu structure that you will need to create. For this, it is better to create a tree-like data diagram that will help to see the overall picture of what menu items will be under what sections within the menu.
In this tutorial, as an example, we will import two Menus – “Main Menu” and “Footer Menu”. The main menu will consist of Home, various collections, and search, while in the Footer we will add various store policies.
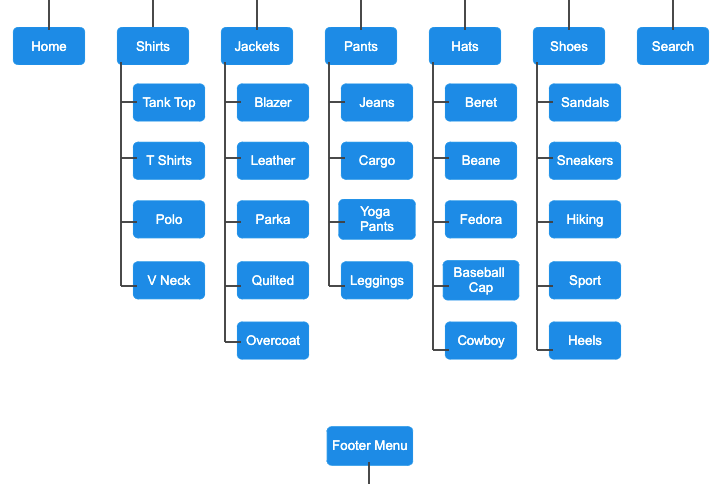
If you are referencing specific Products, Collections, Blog Posts, Blogs, Pages or Metaobject Entries then they need to exist in the store before Importing Menus. If you are referencing your store’s Policies, then you need to ensure that the policy is set in the Shopify Admin -> Settings -> Policies section.
Create your Menu data file
Now that we have a clear structure we need for our Menus we can create a new Excel file with our Menus data.
Create an Excel file with Menu template columns
Create a new Excel spreadsheet file with one sheet/tab called “Menus”.
In the Excel file we will need the following columns:
Title – name of the Menu.Menu Item: Title – name of the Menu Item.Menu Item: Resource Type – type of resource linked to the Menu Item.Menu Item: Resource Handle – Handle for the resource linked to the Menu Item.Menu Item: Collection Tags – optional attribute if you need to apply tag filters to the collection linked in Menu Item. List of comma-separated tags.Menu Item: URL – optional attribute, needed only if menu item is linked to custom URL.Menu Item: Parent Title – Menu Items parent Title indicating to which other Menu Item this Menu Item is linked to. Used to create a hierarchy structure within the Navigation Menu.Menu Item: Position – position of the Menu Item within its parent Menu Item.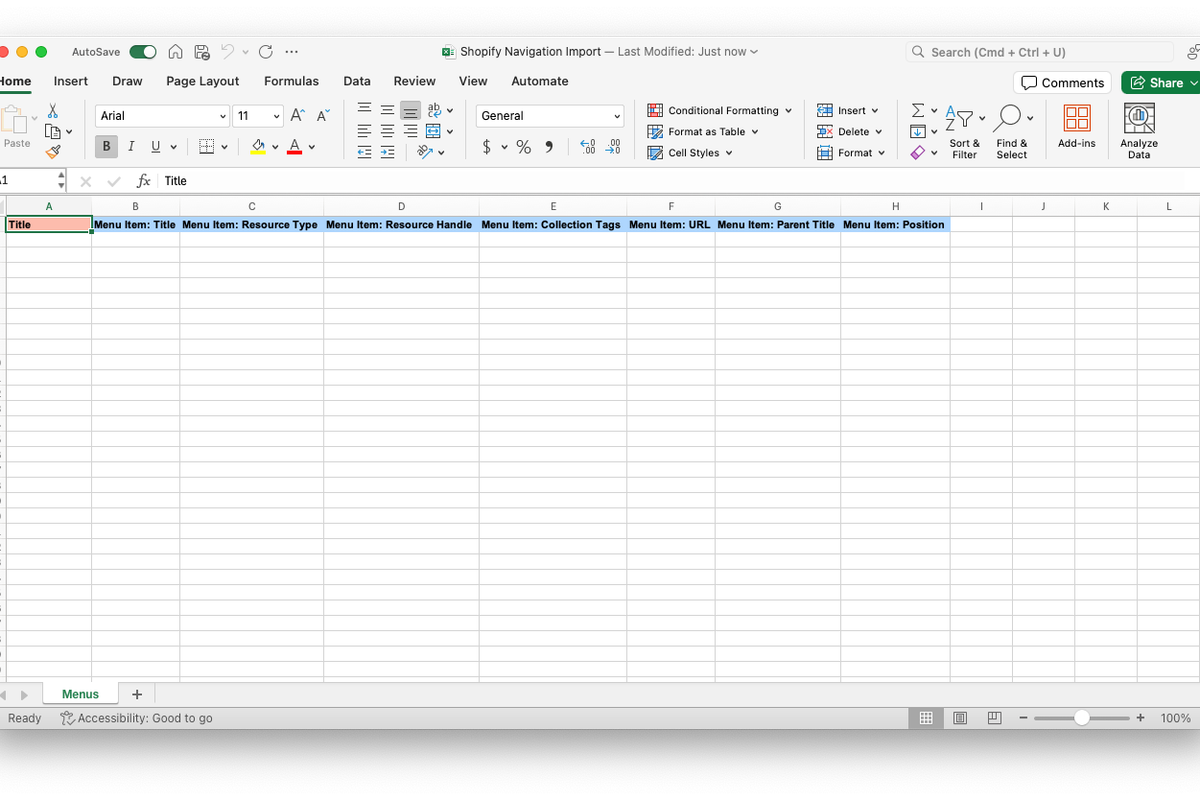
Fill the Menu spreadsheet file with your Navigation data
The Matrixify Menus template file has one row for each Menu Item that a customer can select in the Online Store.
Title
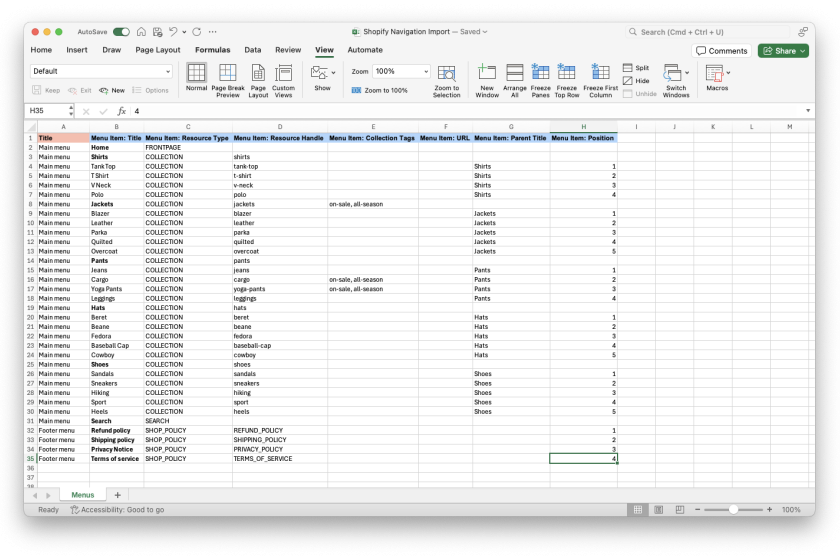
When adding Menu Items in your import file, you need to ensure that the Title column is filled with the same value in all rows for the same Menu. In our example for this tutorial, we have two menus – “Main menu” and “Footer menu”.
“Main menu” consists of 30 sub items so we can add the Title for “Main menu” in 30 rows. “Footer menu” consists of 4 sub items so we can add adding 4 rows with the Title as “Footer menu”.
Menu Item: Title
Now that we can see the size of the file, we can add our Menu Items to the file. A single row in the file indicates one Menu item.
Assign the name to the Menu Item in the Menu Item: Title column, for example, “Home”.
Resource linked to the Menu Item
Menu Item: Resource Type
Set to what resource type the menu item is linked to. The value in this column can be a value from the following list:
ARTICLE – linked to a Blog Post.BLOG – linked to a Blog.CATALOG – linked to “All Products”.COLLECTION – linked to a specific collection.COLLECTIONS – linked to “All Collections”.CUSTOMER_ACCOUNT_PAGE – linked to front-end Orders, Profile, and Settings pages for the customer.FRONTPAGE – linked to the Online Store “Home” page.HTTP – linked to a custom URL.METAOBJECT – linked to a Metaobject entry.PAGE – linked to store page from Online Store -> Pages section.PRODUCT – linked to specific Product.SEARCH – linked to Search.SHOP_POLICY – linked to specific online stores policy.Menu Item: Resource Handle
This column has a different value depending on the Menu Item: Resource Type to which the menu item is linked to. Read what possible values you can assign in this column in Matrixify Menus documentation – Menu Item: Resource Handle field.
In the Menu Item: Resource Handle column, you can fill in the following values:
ARTICLE, BLOG, COLLECTION, PAGE or PRODUCT.CATALOG, COLLECTIONS, FRONTPAGE, HTTP or SEARCH.ARTICLE set value as blog_handle.blog_post_handle.METAOBJECT set value as metaobject_handle.enitry_handle.SHOP_POLICY then set value from the following list of policies:CONTACT_INFORMATIONLEGAL_NOTICEPRIVACY_POLICYREFUND_POLICYSHIPPING_POLICYSUBSCRIPTION_POLICYTERMS_OF_SALETERMS_OF_SERVICECUSTOMER_ACCOUNT_PAGE then value is one of the follow front-end pages for the customer:ordersprofilesettingsMenu Item: Collection Tags
If the resource type is COLLECTION and the Menu Item is linked to a specific collection, you can set up specific tags that Shopify will automatically filter the collection by when the Menu Item is opened.
For any other resource types, this column remains empty.
Menu Item: URL
If the menu item resource type is HTTP and Menu Item is linked to a custom URL link, use this column to specify the link.
Menu Item hierarchy
Menu Item: Parent Title
This column will create the hierarchy for the Menu.
The first layer of the Menu Items in Menu have parent details empty as they are linked to the menu itself. For the sub-layer Menu Items we can assign the Title of the Menu Item to which this row is linked to. For example, if you require to have Menu Items “Sandals” and “Sneakers” under Menu Item “Shoes” then you would enter “Shoes” in this column.
Menu Item: Position
Use this column to set the position of the Menu Items within its parent.
You can also leave this column empty when creating a new Menu. Then Matrixify app will use the sorting of the Menu Items as they are listed in the import file.
Finished Excel file to create Navigation Menus in Shopify
Now your file should be finished and contain all the required data to bulk create and import your Shopify Online Store Menus!
Import Menus file with the Matrixify app
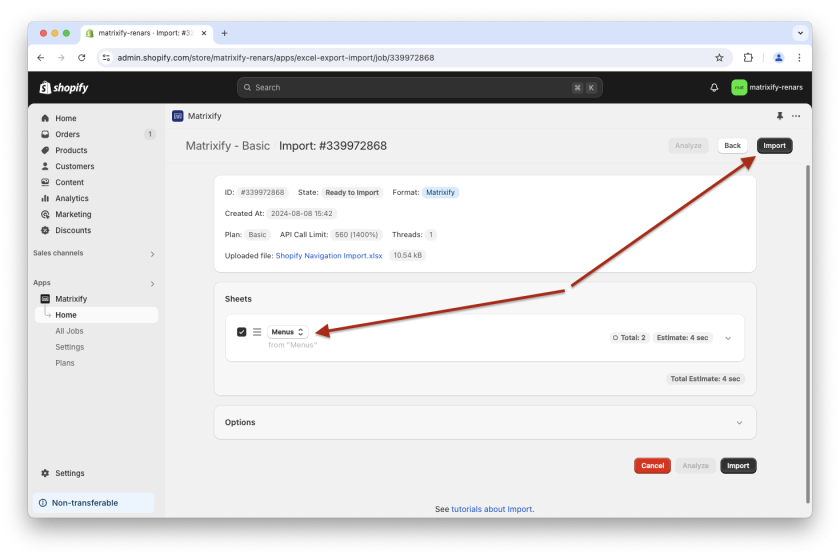
In the Matrixify app Home page locate the Import section and upload your file in the app. The app will open a New Import page and analyze the file by reading the contents of your uploaded files.
Once analyzed, if the details about the import file look correct, you can press the “Import” button to start your import. No options or other settings need to be adjusted.
See your imported Shopify navigation menus in your Shopify Admin -> Online Store -> Navigation section.